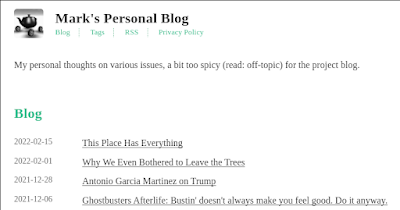
One of the things I’ve missed, having moved my blog off of Blogger, is the metrics. I don’t use the metrics for much, but there’s a nonzero serotonin hit to knowing that my content is read by someone. It’d be nice to be able to restore at least that piece of the Blogger feature-set.
Fortunately, I have access logs and a log analyzer.
I’ve settled on goaccess for my log analysis; it’s pretty straightforward, takes HTTP access logs as input, and presents the data visually (including on the command line). It’s installable on my local machine via the package manager (sudo apt-get install goaccess), so no problems there.
The steps are pretty straightforward:
Get the logs
Dump them into goaccess
The script to do that is short and sweet:
#!/bin/bash

SERVER=fixermark.com
LOGPATH=logs/personal-blog.fixermark.com/http
DESTINATION=logfiles

mkdir -p "$DESTINATION"
scp $SERVER:$LOGPATH/access.log* $DESTINATION
pushd $DESTINATION
# this is redundant because it's a symlink on the server to the most recent logfile
rm access.log.0
# gunzip will confirm replacing files
yes | gunzip -f *.gz
popd
goaccess $DESTINATION/access.log*
I run that, and I’m presented with a nice terminal interface for viewing the logs.
This is a good start!
Filtering
goaccess doesn’t support any filtering directly, but access logs are relatively simple to filter with command-line tools, and goaccess does support receiving its logs from the command line. Here’s a simple script to drop the logs related to various static content pieces:
In an earlier post, I added self-hosted static comments via shortcodes in Hugo. This approach had some benefits, but I didn’t like how it required modifying every blog page to support comments, even if no comments were present.
Hugo has a system of partials and templates to allow for similar pages to have the same layout. We can take advantage of these to handle comments on every blog page. This will pull the comments out of the main flow of the blog posts; we could move them into the front matter of the pages, but insted I’m going to knock out another con of the previous approach and consolidate all comments into one data file.
The method
We have a few steps to go through here:
Consoolidate comments into a data file
Build comments.html and comment.html as partials
Build a new blogpost template to use the comments partial
Use cascading front-matter to shift all the blog posts to the new template
Consolidate comments into a data file
To make it easy to work with comments as a separate construct from posts, we’ll shift all of them into a new file at data/comments.yaml. Hugo automatically parses files in the data directory and makes their content available for the site builder as site.data.<name of file>.
I’m using yaml because it splits the difference a bit: easy to use, but allows for multi-line strings without a lot of hassle (and it place nicely with my emacs config). here’s a snippet of the resulting yaml file.
"/posts/2021/this-is-year-of-linux-on-desktop/":
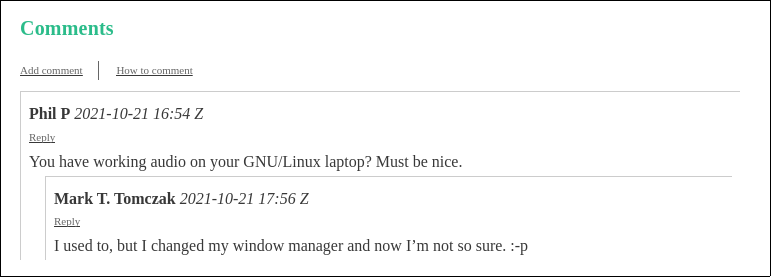
- id: 1username: "Anon 1"date: 2021-10-21T16:54:40.122Zcomment: You have working audio on your GNU/Linux laptop? Must be nice.replies:
- id: 2username: Mark T. Tomczakdate: 2021-10-21T17:56:00.084Zcomment: I used to, but I changed my window manager and now I'm not so sure. :-p"/posts/2021/marks-gallery-of-facebook-infractions-3/":
- id: 1username: Anon-2date: 2021-06-14T15:34:10.877Zcomment: | My vote is for "kill the filibuster." This is a failure of the algorithm to differentiate actual calls for violence from figurative language. I wonder if you could post a comment about "Killing the Lights" when discussing what you might do before a movie or bedtime.
Reminds me of when I tried to sell a dart board on FB Marketplace, and I included a photo of the darts themselves. I had my post removed for trying to sell weapons.
There is an ENTIRE CATEGORY devoted to "Darts Equipment." Oh, Zuck...
Worth noting:
The top-level object is a dictionary mapping post paths to a list of the top-level comments in the posts
comment IDs are unique within the post (they’re used to build URLs to email replies in)
We preserved the tree structure from the previous short-code solution, but since the replies are now a separate field from the comment text body, we’ll be able ot use Markdown on the comment without mangling replies.
Build the comments.html partial
The partial at layouts/partials/comments.html finds the comments for the current page. If they exist, it stitches them in.
{{ with site.Data.comments }}
{{ $comments := index . $.Page.RelPermalink }}
<div class="comments">
  <h1 class="comments">Comments</h1>
  <div class="comments-menu">
    <ul>
      <li>
        <a href="mailto:blog+personal-comment@fixermark.com?body=Your Name:%0d%0aIcon:%0d%0aComment:&subject=Comment on {{ $.Page.Permalink }}">
          Add comment
        </a>
      </li>
      <li>
        <a href="/how-to-comment">How to comment</a>
      </li>
    </ul>
  </div>
  <div class="comments">
  {{ with $comments }}
    {{ $sorted := sort $comments "date" "desc"}}
    {{ range $sorted }}
      {{ partial "comment.html" (dict "comment" . "permalink" $.Page.Permalink) }}
    {{ end }}
  {{ else }}
      <div class="no-comments"><i>This article has no comments</i></div>
  {{ end }}
  </div>
</div>
{{ end }}
Once we fetch the list of comments, we check for any comment list with a key matching this page. If we find any, we sort them by date and render them ({{ range $sorted}}). This partial also renders a header for the comments section and a link to add a comment to the post.
Partials receive only the state given to them by their invoking template. When we render individual comments with the comment.html partial, we only give it the two pieces of information it needs (in the form of a new dictionary): the comment data as comment and the link to this page as permalink. The link is used to build replies to comments.
Build the comment.html partial
Rendering individual comments is delegated to a second partial.
We pretty up the time representation of the comment using time.Format and run the body of the comment through markdownify to convert any special characters. We also add a reply link taking advantage of the comment ID.
Note that to render replies to this comment, this partial re-invokes itself passing the reply as the comment. This sort of recursion is fine in Hugo as long as it’s not infinite (the nature of the tree data structure this function is running on makes such infinite recursion impossible).
Build a new blogpost template to use the comments partial
Hugo allows pages to specify their type, which determines which of several templates Hugo will use to render the content of the page. Now that we have comments, I copied the single.html template from the theme I’m using into layouts/blogpost/single.md and replaced its invocation of a comment partial with my own:
{{ partial "comments.html" . }}
At this top level, I give the partial everything the template has for convenience.
Use cascading front-matter to shift all the blog posts to the new template
Hugo uses a speciall-named _index file to allow for application of front-matter to every page in a subdirectory of the site. Using that, it’s straightforward to shift all my blog posts to the new tepmlate. I add the file content/posts/index.md:
---
cascade:
  type: blogpost
---
Now, every page under posts/ has its type set by default.
Putting that all together (and adding a bit of CSS to clean the formatting), we now have comments on every page without changes to every page. Very happy with the result!
Pros and cons
Pros
Thread flow still clear
Replies are nested under their comments. I’m glad I didn’t have to lose this from the inline solution
Comment text is just markdown
I’m much happier with markdown as the comment body text than markup; easier to read, and modestly harder for end-users to find a way to accidentally break the whole sight flow
Cons
Comments no longer live on their articles
I’m considering this a pro in the overall assessment. It’d be nice if comments lived right next to their articles, but with comments consolidated in one file it’s much easier to manage them as an entity (including scrubbing one if a user asks to have it removed; I only have to purge one file through all archives).
Final thoughts
I’m really finding Hugo very straightforward to use. It’s nice to have my toolchain more tightly integrated and this level of control over both content and presentation.
Having chosen to self-host my Hugo comments as part of the static page content, there are a couple of ways to do it. In this article, I explore embedding them in the page using shortcodes.
The method
Comments in my blog are represented by two shortcodes.
comment.html
The first shortcode collects comment data in a semi-structured way and emits it as HTML. Here’s the whole thing.
\{\{< comment id="100" username="Phil P" date="2021-10-21T16:54:40.122Z" >}}
You have working audio on your GNU/Linux laptop?  Must be nice.

  \{\{< comment id="101" username="Mark T. Tomczak" date="2021-10-21T17:56:00.084Z" >}}
  I used to, but I changed my window manager and now I'm not so sure. :-p
  \{\{< / comment >}}
\{\{< / comment >}}
Note that the approach supports nesting; a comment emitted into the Inner material of another comment is just copied along with the other content, so we just roll the comment tree up as we go.
Also worth noting in the definition of the shortcode is the mailto link. The link is constructed such that it auto-populates the body and the subject for easy adherence to the commenting policy; uesrs get started with a template email that will get me the right information to add their comment. Right now, this process is manual, but I’ve attempted to wire it up so it can be easily automated in the future.
comments.html
A wrapper shortcode serves as an envelope for all the comments on the page and provides some placeholder text if there are no comments.
/layouts/shortcodes/comments.html
<div class="comments">
  <h1 class="comments">Comments</h1>
  <div class="comments-menu">
    <ul>
      <li>
        <a href="mailto:blog+personal-comment@fixermark.com?body=Your Name:%0d%0aIcon:%0d%0aComment:&subject=Comment on \{\{ $.Page.Permalink }}">
          Add comment
        </a>
      </li>
      <li>
        <a href="/how-to-comment">How to comment</a>
      </li>
    </ul>
  </div>
  \{\{ if (not .Inner) }}
  <i>This article has no comments</i>
  \{\{ else }}
  \{\{ .Inner }}
  \{\{ end }}
</div>
This code injects the HTML to show a Comments section in the page; it constructs a mailto link like the Reply button does (exercise for the reader: both of those links can stand to be further consolidated into their own shortcode, since they’re so similar). It also provides a simple placeholder text if there are not yet any comments.
Overall, I’m not at all unhappy with the result! (Editor’s note: I haven’t done a CSS pass on this yet, this just shows structure).
Pros and cons
Overall, I’m not unhappy with this approach, but it has some tradeoffs.
Pros
Thread flow is very clear
The fact replies are nested means it’s easy to see the flow of the conversation by reading the markdown itself.
Comment text is just markup
The comment text is just inline HTML, so relatively easy-to-read. It also supports everything I could possibly want to support (abuse of this—after all, it’s user-supplied content directly injected into the page—is moderated by the fact that the comments are hand-stitched into the page by me).
Cons
Mixes content and presentation
To support this approach, we need the \{\{< comments >}} shortcode on every page. Even though Hugo supports template pages (archetypes), that’s a maintenance burden. Ideally, stitching comments into the page should be the job of the layout itself, while the comments would be metadata for the page.
Markup, not markdown
Because shortcodes output HTML, I can’t use Markdown for the body of the comments; trying to pass a comment with replies through the Markdown parser mangles the HTML emitted by the nested \{\{< comment >}} shortcodes. Markdown is easier to work with and further constrains the styling in a nice way, which I enjoy.
Lack of consolidation
There’s benefit to having comments consolidated in one place for management. For example, adding a new comment with this approach requires mapping from the Subject line of an email to the relevant URL (and comment ID). If comments were consolidated in one place, adding new comments would be a simple append operation.
What’s next?
This approach is working for now, but I’m going to pursue moving the comments into page front-matter (or even a central data file that is read once and built into a scannable structure).
After putting a bit of thought into it, I’ve decided to start the process of switching my personal blog to self-hosting on Hugo instead of hosting through Blogger. This blog is staying where it is, but I’ve been playing with the Hugo framework for awhile and am finding I really enjoy it. Expect to see some posts about my experiences with it in here from time-to-time.
Why switch?
Even with the benefit of Google Takeout, moving blog infrastructure is time-consuming. So why have I bothered? A few reasons, in no particular order:
Tooling and control
Blogger’s UI hasn’t been updated in approximately ten years. It’s an acceptable WYSIWYG editor, but the resulting under-the-hood HTML is opinionated and has some weird formatting decisions. The editor also doesn’t support many keyboard accelerators, and it’s incredibly frustrating to have to break flow typing to go push a button to change style. In practice, I’ve been side-stepping the UI completely for weeks by writing blog posts in Markdown and copying-and-pasting the resulting HMTL directly into the raw editor view in Blogger. And I’m ultimately at the mercy of Blogger’s opinion of how layout should be done; some of my images overflow the content space, and I can either shrink them or leave that as-is.
Hugo lets me cut out the middle-man in that process; it renders directly from Markdown to HTML and the rendering can be reconfigured. The renderer is extensible via shortcodes that tap into the Go infrastructure under the hood. I’m doing most of my blogging in emacs now, and it feels great. In the future, I should be able to automate the flow of adding a post, recompiling, uploading to my server, and publishing updates.
Privacy, tracking, and censorship
Of all the reasons, this is the least significant one, but it bears mentioning: I think enough of my potential readers have come to care about the information-harvesting capacity of Google that I’d like to do them a solid and move off of a Google-hosted service. I’ll lose some of my analytics, and I have to support my own comments, but I think those are going to be exciting enough challenges to justify the cost. The recent rulings regarding Google Analytics and the GDPR seem to have some people backing towards the exits on that infrastructure anyway.
Google also has a bad habit (or good habit, if your goal is to combat spam and bad actors; I’m still enough of a company man that I see it their way too) of deciding you’ve violated their terms of service and blowing all your Google services out of the water as a result. I’ve already soft-firewalled the personal blog behind ownership by my non-primary account, but since it’s the “spicier” one, I run the risk that I’ll trip over Google’s constantly-evolving TOS some day, they’ll decide my primary and non-primary accounts are the same actor, and I’ll lose both. Moving the entire thing off to another host decreases the odds of that outcome.
Things I’ll miss
Not too many, it turns out.
Embedding images
One thing the WYSIWYG editor actually does do quite nicely is image embedding. The flow in Hugo isn’t as clean; I have to copy the image into a folder alongside the blog post and then reference the filename in the Markdown. That having been said, I strongly suspect I’ll be able to automate that process with a couple of emacs macros to turn it into fetching an arbitrary file, copying it into the right location, and adding the reference.
It turns out, embedding video is more straightforward in Hugo; there’s a shortcode for linking to YouTube (assuming I don’t just self-host the video content).
Will the old content be going away?
No. I don’t plan to add more posts to the personal blog, but I’ll be keeping it up so that hyperlinks don’t break. This will, in practice, fork comments, but I’ve decided I don’t care too much about that issue (comment load is low enough that it’s a non-issue).
How will you do comments on the new blog?
Great question! As a static site generator, Hugo’s engine doesn’t handle comments natively. Hugo integrates with a variety of comment engines, but after putting some thought into it and reading what others have done, I decided to just have people email me comments and I’ll embed them into the site. This doesn’t completely detach me from Google (my email service is GMail), but it gives users some confidence that I’m not dumping their information directly into the hopper.
Will I be moving this blog?
It’s possible, but I think unlikely in the near future. This one is heavier (including more images and more posts), and will take quite a bit more time. But if my experience with the personal blog goes well, we’ll see.
Now that we can draw some hexagons, I'd like to animate them cross-fading occasionally from one color to another. This process will involve a few steps; we need to set up a rudimentary animation framework, and from there we'll take advantage of it to control the color of specific hexes and update them as they cross-fade back and forth.
The framework
The animation framework is pretty simple:
* A HexAnimate abstract object to track animation state and update the canvas
* A PulseHex concrete object that cross-fades a hex from one color to another and back
* A list of currently-running animations
* An update loop
* A system for spawning new animations when the previous one is done
HexAnimate
A HexAnimate object is just an object that knows how to animate itself:
public abstract animate(timestamp: number, ctx: CanvasRenderingContext2D): boolean;
The timestamp is passed in so every animating element is sync'd to the same time, ctx is where to render to. Finally, the whole animate method returns true if it should be scheduled again next animation frame or false if it is done animating and can be discarded.
PulseHex
The PulseHex is a non-generalized animation to cross-fade one hex's color from a start point to a "peak" point and back over time.
export class PulseHex extends HexAnimate {
    constructor(
        private xIndex: number,
        private yIndex: number,
        private startTime: number,
        private peakTime: number,
        private endTime: number,
        private startColor: Color,
        private endColor: Color) {
        super();
    }

    public animate(timestamp: number, ctx: CanvasRenderingContext2D): boolean {
        if (timestamp > this.endTime) {
            // Render one last time to clear all the way to the initial color
            ctx.save();
            HEX_TEMPLATE.offsetToHex(ctx, this.xIndex, this.yIndex);
            HEX_TEMPLATE.render(ctx, colorToCode(this.startColor));
            ctx.restore();

            return false;
        }
        const color = timestamp < this.peakTime ?
            interpolate(this.startColor, this.endColor, (timestamp - this.startTime) / (this.peakTime - this.startTime)) :
            interpolate(this.startColor, this.endColor, (this.endTime - timestamp) / (this.endTime - this.peakTime));


        let stringRep = colorToCode(color);

        ctx.save();
        HEX_TEMPLATE.offsetToHex(ctx, this.xIndex, this.yIndex);
        HEX_TEMPLATE.render(ctx, stringRep);
        ctx.restore();

        return true;
    }
}
The constructor takes in the X and Y index of what hex to animate, a start, peak, and end timestamp, and what color we should start (and end) at and the color we should reach at peak time.
The animation logic splits into a terminator and a continuation: the first condition checks to see if we're past end time, and if we are we draw one last hexagon at start color to reset the hex to initial conditions. If we're not, we pick a color by interpolating between start and end (if before peak time) or end and start (if after peak time). The interpolation function is a very simple a + t(b-a) interpolation of each of the red, green, and blue components; not the fanciest (or necessarily the best-looking from a human perception standpoint), but it's a reasonable starting point. Once color is chosen, we draw the relevant hexagon.
List of currently-running animations
let animations: HexAnimate[] = [];
Nothing fancy here; literally an array of animation objects. Worth noting is that this allows more than one to be running at a time; we don't take advantage of that right now, but we will!
The update loop is very simple: we ask every animation to run, and if it returns false we drop it out of the list of animations for next loop. Once they've run, we push the new canvas to the background and schedule ourselves to run again.
A system for spawning new animations when the previous one is done
When our animation queue is empty, we construct a new one. This approach will guarantee us exactly one running at all times. We cheat a bit on the logic of the X and Y coordinates to inset from the edges so that we don't reveal the repetition seam of the background image.
With all those pieces put together, I'm pretty happy with the end result!
I've been working on a project (http://usfirst.org) that combines vscode with a simulator to run Java locally. One small annoyance is that every time the program runs, the simulator opens a new window on the same desktop, but it's intended to be run full-screen. Since I'm running XMonad, I have to manually window-shift-number to send the simulator off to another workspace. That's the sort of annoyance I run my own window manager to deal with.
So let's deal with it.
First, we have to discriminate the simulator window from others. No major issue there; the xprop command-line tool lets us get details on the window. Just run and click.
The relevant detail here is WM_CLASS, which is the window class and appears to be the nice, stable string "Robot Simulation". Great!
XMonad includes manageHook rules that let us hook into the rules for window config. Documentation lives here; there's a lot, but the most relevant ones are that we can get the class of the window (className) and we can direct the window to go to a different workspace (doShift). The stanza is a simple piece of XMonad line noise:
... then just modify the top of my xmonad declaration to include that logic.
main = do
    xmproc <- spawnPipe "xmobar"

xmonad $ docks defaultConfig
     { manageHook = windowAffinities <+> manageDocks <+> manageHook defaultConfig
(Note: if you want more than one, the composeAll [ hooks ] grouping will do so. Just make sure the brackets [] get on their own lines, or Haskell will complain "parse error (possibly incorrect indentation or mismatched brackets)".
Added that stanza, a quick Windows-Q to reload the XMonad rules, and the next time the simulator opened, it opened on workspace 9. Just a little less typing to do what I mean.
Now that we can render and animate hexagons, can we tilt them?
Spoiler: yes
Directly in the rendering logic, this is tricky. I'll have to add a rotation to the canvas (easy) and then find the height and width of a rectangle overlapping the canvas at which tesselation occurs so I can tile the background (much less easy). Fortunately, CSS transforms can make this much easier—not perfectly easy, but not bad.
The big challenge doing something like this with CSS is that CSS conflates rendering logic and layout logic: every object visible on the page is a DOM element, and every DOM element impacts the page layout. In an ideal world, I could just set a rendering rule for the background and let layout operate separately (the elementbackground-image type supported by Firefox gets close to allowing this). Instead, the approach is a bit more complex:
Leave the background of body unchanged
As children of body, have two divs: one to serve as background container, one to hold content
The background-container div addresses the layout concern: it is set to fill 100% of the window and uses overflow: clip to clip off any excess content that tries to overflow the window
As child of background-container, a background div is set larger than the window, is set to repeat its image, has the rotation applied, and has a z-index set to be behind other content
The content div is set to also take up the whole window and has a z-index set to be in front of the background.
Without the background-container, the background forces the layout algorithm to try and fit the entire tilted element, which introduces unwanted scrolling.
It's not the prettiest CSS but it gets the job done.