Monday, February 28, 2022

Animating pulsing hexagons

Now that we can draw some hexagons, I'd like to animate them cross-fading occasionally from one color to another. This process will involve a few steps; we need to set up a rudimentary animation framework, and from there we'll take advantage of it to control the color of specific hexes and update them as they cross-fade back and forth.

The framework

The animation framework is pretty simple: * A HexAnimate abstract object to track animation state and update the canvas * A PulseHex concrete object that cross-fades a hex from one color to another and back * A list of currently-running animations * An update loop * A system for spawning new animations when the previous one is done

HexAnimate

A HexAnimate object is just an object that knows how to animate itself:

public abstract animate(timestamp: number, ctx: CanvasRenderingContext2D): boolean;

The timestamp is passed in so every animating element is sync'd to the same time, ctx is where to render to. Finally, the whole animate method returns true if it should be scheduled again next animation frame or false if it is done animating and can be discarded.

PulseHex

The PulseHex is a non-generalized animation to cross-fade one hex's color from a start point to a "peak" point and back over time.

export class PulseHex extends HexAnimate {
    constructor(
        private xIndex: number,
        private yIndex: number,
        private startTime: number,
        private peakTime: number,
        private endTime: number,
        private startColor: Color,
        private endColor: Color) {
        super();
    }

    public animate(timestamp: number, ctx: CanvasRenderingContext2D): boolean {
        if (timestamp > this.endTime) {
            // Render one last time to clear all the way to the initial color
            ctx.save();
            HEX_TEMPLATE.offsetToHex(ctx, this.xIndex, this.yIndex);
            HEX_TEMPLATE.render(ctx, colorToCode(this.startColor));
            ctx.restore();

            return false;
        }
        const color = timestamp < this.peakTime ?
            interpolate(this.startColor, this.endColor, (timestamp - this.startTime) / (this.peakTime - this.startTime)) :
            interpolate(this.startColor, this.endColor, (this.endTime - timestamp) / (this.endTime - this.peakTime));


        let stringRep = colorToCode(color);

        ctx.save();
        HEX_TEMPLATE.offsetToHex(ctx, this.xIndex, this.yIndex);
        HEX_TEMPLATE.render(ctx, stringRep);
        ctx.restore();

        return true;
    }
}

The constructor takes in the X and Y index of what hex to animate, a start, peak, and end timestamp, and what color we should start (and end) at and the color we should reach at peak time.

The animation logic splits into a terminator and a continuation: the first condition checks to see if we're past end time, and if we are we draw one last hexagon at start color to reset the hex to initial conditions. If we're not, we pick a color by interpolating between start and end (if before peak time) or end and start (if after peak time). The interpolation function is a very simple a + t(b-a) interpolation of each of the red, green, and blue components; not the fanciest (or necessarily the best-looking from a human perception standpoint), but it's a reasonable starting point. Once color is chosen, we draw the relevant hexagon.

List of currently-running animations

let animations: HexAnimate[] = [];

Nothing fancy here; literally an array of animation objects. Worth noting is that this allows more than one to be running at a time; we don't take advantage of that right now, but we will!

Update loop

const timestamp = Date.now();

// ...

animations = animations.filter((animation) => animation.animate(timestamp, context));

updateBackground(canvas);

setTimeout(updateRender, 1000 / FPS);

The update loop is very simple: we ask every animation to run, and if it returns false we drop it out of the list of animations for next loop. Once they've run, we push the new canvas to the background and schedule ourselves to run again.

A system for spawning new animations when the previous one is done

if (animations.length === 0) {
    animations.push(new PulseHex(
        Math.floor(Math.random() * (CANVAS_HEXES_ACROSS - 2)) + 1,
        Math.floor(Math.random() * (CANVAS_HEXES_DOWN - 2)) + 1,
        timestamp,
        timestamp + 1000,
        timestamp + 3000,
        codeToColor(DEFAULT_HEX_COLOR)!,
        {
            r: Math.random() * 256,
            g: Math.random() * 256,
            b: Math.random() * 256,
        }
    ));
}

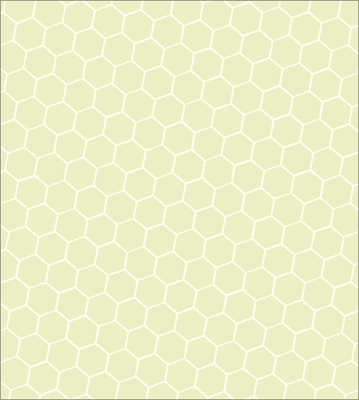
When our animation queue is empty, we construct a new one. This approach will guarantee us exactly one running at all times. We cheat a bit on the logic of the X and Y coordinates to inset from the edges so that we don't reveal the repetition seam of the background image.

With all those pieces put together, I'm pretty happy with the end result!


The full code is available on GitHub.

Monday, February 21, 2022

XMonad: giving a window affinity to live on a given workspace

I've been working on a project (http://usfirst.org) that combines vscode with a simulator to run Java locally. One small annoyance is that every time the program runs, the simulator opens a new window on the same desktop, but it's intended to be run full-screen. Since I'm running XMonad, I have to manually window-shift-number to send the simulator off to another workspace. That's the sort of annoyance I run my own window manager to deal with.

So let's deal with it.

First, we have to discriminate the simulator window from others. No major issue there; the xprop command-line tool lets us get details on the window. Just run and click.

> xprop
  WM_STATE(WM_STATE):
        window state: Normal
        icon window: 0x0
  _NET_WM_ICON_NAME(UTF8_STRING) = "Robot Simulation"
  _NET_WM_NAME(UTF8_STRING) = "Robot Simulation"
  WM_LOCALE_NAME(STRING) = "en_US.UTF-8"
  WM_CLIENT_MACHINE(STRING) = "rambler"
  WM_ICON_NAME(STRING) = "Robot Simulation"
  WM_NAME(STRING) = "Robot Simulation"
  XdndAware(ATOM) = BITMAP
  WM_CLASS(STRING) = "Robot Simulation", "Robot Simulation"
  WM_NORMAL_HINTS(WM_SIZE_HINTS):
        program specified location: 0, 0
        window gravity: Static
  WM_HINTS(WM_HINTS):
        Initial state is Normal State.
  _NET_WM_PID(CARDINAL) = 14024
  WM_PROTOCOLS(ATOM): protocols  WM_DELETE_WINDOW, _NET_WM_PING

The relevant detail here is WM_CLASS, which is the window class and appears to be the nice, stable string "Robot Simulation". Great!

XMonad includes manageHook rules that let us hook into the rules for window config. Documentation lives here; there's a lot, but the most relevant ones are that we can get the class of the window (className) and we can direct the window to go to a different workspace (doShift). The stanza is a simple piece of XMonad line noise:

windowAffinities = className =? "Robot Simulation" --> doShift "9"

... then just modify the top of my xmonad declaration to include that logic.

main = do
    xmproc <- spawnPipe "xmobar"

xmonad $ docks defaultConfig
     { manageHook = windowAffinities <+> manageDocks <+> manageHook defaultConfig

(Note: if you want more than one, the composeAll [ hooks ] grouping will do so. Just make sure the brackets [] get on their own lines, or Haskell will complain "parse error (possibly incorrect indentation or mismatched brackets)".

Added that stanza, a quick Windows-Q to reload the XMonad rules, and the next time the simulator opened, it opened on workspace 9. Just a little less typing to do what I mean.

Monday, February 14, 2022

Tilted hexes with CSS

Now that we can render and animate hexagons, can we tilt them?

A tesselation of pale hexagons tilted at twenty degrees
Spoiler: yes

Directly in the rendering logic, this is tricky. I'll have to add a rotation to the canvas (easy) and then find the height and width of a rectangle overlapping the canvas at which tesselation occurs so I can tile the background (much less easy). Fortunately, CSS transforms can make this much easier—not perfectly easy, but not bad.

The big challenge doing something like this with CSS is that CSS conflates rendering logic and layout logic: every object visible on the page is a DOM element, and every DOM element impacts the page layout. In an ideal world, I could just set a rendering rule for the background and let layout operate separately (the element background-image type supported by Firefox gets close to allowing this). Instead, the approach is a bit more complex:

  • Leave the background of body unchanged
  • As children of body, have two divs: one to serve as background container, one to hold content
  • The background-container div addresses the layout concern: it is set to fill 100% of the window and uses overflow: clip to clip off any excess content that tries to overflow the window
  • As child of background-container, a background div is set larger than the window, is set to repeat its image, has the rotation applied, and has a z-index set to be behind other content
  • The content div is set to also take up the whole window and has a z-index set to be in front of the background.

Without the background-container, the background forces the layout algorithm to try and fit the entire tilted element, which introduces unwanted scrolling.

It's not the prettiest CSS but it gets the job done.

.background-container {
    position: absolute;
    left: 0px;
    top: 0px;
    right: 0px;
    bottom: 0px;
    overflow: clip;
}
#background {
    position: absolute;
    left: -100%;
    top: -100%;
    right: -100%;
    bottom: -100%;
    background-repeat: repeat;
    transform: rotate(-20deg);
    z-index: 0;
}

.content {
    position: absolute;
    left: 0px;
    top: 0px;
    right: 0px;
    bottom: 0px;
    z-index: 1;
}

And the result is pretty satisfying!

Monday, February 7, 2022

Animating a web page background

Having confirmed that I can dynamically generate a web page background by rendering an image to canvas (and then setting that canvas's data URL as the background CSS value), the next question becomes: can I animate it?

The cheapest way to do that is with setTimeout. This isn't ideal (it'll block on the UI thread), but does it work at all?

The answer is yes!


The code for the demo is relatively straightforward.

const SEGMENT = 100 / 6;
const HEX_HEIGHT_WIDTH_RATIO = 1.1547005;

const MAX_VALUE=0xdd;

const FPS = 24;

let curTime = 0;
let currentValue = 0;
let ascending = true;

function renderBg(color: string) {
    const canvas = document.createElement('canvas');
    canvas.width = 100;
    const HEIGHT = SEGMENT * 4 / HEX_HEIGHT_WIDTH_RATIO;
    canvas.height = HEIGHT;
    const ctx = canvas.getContext('2d');
    if (!ctx) {
        return;
    }

    ctx.fillStyle = '#' + color;
    ctx.fillRect(0,0,100,HEIGHT);


    ctx.strokeStyle= "white";
    ctx.lineWidth = 3;
    ctx.beginPath();
    ctx.moveTo(0, HEIGHT / 2);
    ctx.lineTo(SEGMENT, HEIGHT / 2);
    ctx.lineTo(2 * SEGMENT, 0);
    ctx.lineTo(4 * SEGMENT, 0);
    ctx.lineTo(5 * SEGMENT, HEIGHT / 2);
    ctx.lineTo(100, HEIGHT / 2);
    ctx.moveTo(SEGMENT, HEIGHT / 2);
    ctx.lineTo(2 * SEGMENT, HEIGHT);
    ctx.lineTo(4 * SEGMENT, HEIGHT);
    ctx.lineTo(5 * SEGMENT, HEIGHT / 2);
    ctx.stroke();

    const body = document.getElementsByTagName('body').item(0);
    if (!body) {
        return;
    }
    body.style.background=`url(${canvas.toDataURL()})`;
}

function updateRender() {
    let increment = (MAX_VALUE / 2.0 / FPS);
    if(!ascending) {
        increment = -increment;
    }

    currentValue += increment;
    if (currentValue > MAX_VALUE || currentValue < 0) {
        currentValue = Math.min(MAX_VALUE, Math.max(0, currentValue));
        ascending = !ascending;
    }

    let stringRep = Math.floor(currentValue).toString(16);
    while (stringRep.length < 2) {
        stringRep = '0' + stringRep;
    }

    renderBg(`EEEE${stringRep}`);

    setTimeout(updateRender, 1000/FPS);
}

setTimeout(updateRender, 1000/FPS);

The approach is pretty straigtforward: run a function 24 times a second to cycle through colors and redraw the background, then output the updated background data-URL to the body's background CSS property.

Performance isn't perfect (GPU process eats about 24% of my CPU when the tab is foreground), but the UI thread doesn't appear to be badly blocked. I'll have to test it on mobile next to see how much it harms performance.