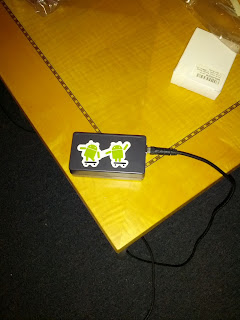
So this week, I finally purchased an enclosure and power supply for my UNO board. Trying it out, I immediately discovered that the enclosure doesn't really fit my Ethernet shield (which the reviews will tell you gladly; that's what I get for not reading the reviews before purchasing). Since I didn't need the shield, I shed it (I'll probably get another UNO to plug it into later).
Then, I got out my kit and got to work. It's been awhile since I had occasion to solder anything, and I've never done hot glue for an electronics project before. Overall, I'm not unhappy with the results.
I made a hole in the enclosure using a 3/16" bit on my Dewalt drill, angling it diagonally back-and-forth to get a good wide slot (I wanted to make sure the receiver had a nice, wide field-of-view to catch IR signals). I then seated the Arduino board in the enclosure and glued the IR sensor in place with my wife's glue gun (note to self: I've stolen my wife's glue gun and owe her a new one). My gluing technique is hellishly wasteful, but I figure I'll get better with practice. One thing I love about working with glue is that it doubles as an insulator; no more wiggling my fingers in between tiny wire runs to get the electrical tape on there!
 |
| IR decoder visible through the drilled slot in the side of the enclosure. |
Once the glue solidified a bit, I did a quick soldering job and was all set. I wrapped the signal and power wires around the posts in the enclosure also and threw some hot glue on there for mechanical stability (I want to make sure any jostles the wires might take are being supported by the posts and not the Arduino's female pin coupler or the IR sensor's leads).
I then fished a sticker out as a finishing touch. :)
I'm very happy with both this sensor and its range. I ran some quick tests with the full enclosure at different ranges using my old remote signal decoder program, and found it was able to sense a good distance away (about 15 feet; plenty for my needs).
What I learned
- This IR sensor is more temperature-resistant than I'd feared it might be; I ran the soldering without any heat sinks, and no harm was done.
- Hot glue is actually pretty safe to work with; I'd worried I would get burned, but discovered that it appears to shunt its heat pretty quickly as it transitions to a solid state. solid strands can be touched within a few seconds of being emitted from the nozzle (though blobs should be given about thirty seconds to a minute to gel cleanly; they change opacity a bit on solidification, which is convenient).
- Hot glue is messy; spiderweb-strands everywhere, needed to go in with pliers to clean it up. Also, I'll be more careful in the future about letting the glue find its way into the seam of the enclosure itself; my enclosure no longer seats quite correctly because one blob of glue bubbled over the top and got into the joint.
Part 2 will discuss extending the software and adding status indicators.


No comments:
Post a Comment